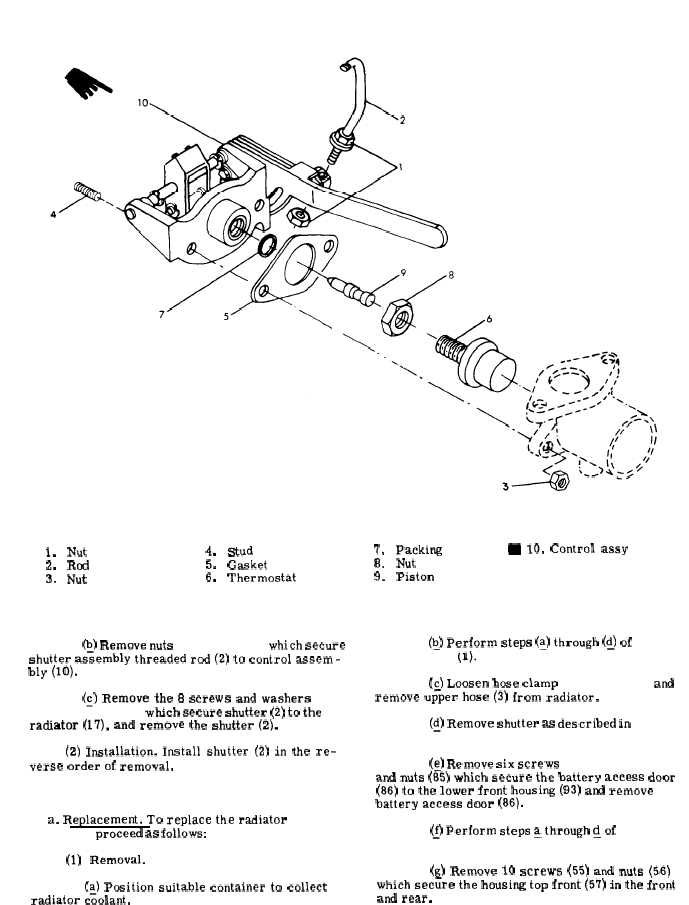
1.
Nut
4.
stud
7.
Packing
W 10. Control assy
2.
Rod
5.
Gasket
8.
Nut
3.
Nut
6.
Thermostat
9.
Piston
F i g u r e
3 - 3 0 .
S h u t t e r
T h e r m o s t a t
R e p l a c e m e n t
(~) Remove nuts ( 1 , f i g . 3 - 3 0 ) which secure
shutter assembly threaded rod (2) to control assem-
bly (10).
(~) Remove the 8 screws and washers
( 1 , 1 A , f i g . 3 - 3 1 ) w~ch secure shutter (2) to the
radiator (17), and remove the shutter (2).
(2) Installation. Install shutter (2) in the re-
verse order of removal.
3 - 1 7 2 .
R a d i a t o r .
a. Replacement.
To replace the radiator
( 1 7 ,
f i g . 3 - 3 1 ) proceed as follows:
(~) Perform steps (s) through @) of
p a r a -
g r a p h 3 - 1 7 0 b (1).
(c) Loosen hose clamp ( 1 , f i g . 3 - 2 9 ) and
remove up–per hose (3) from radiator.
(y) Remove shutter as described in
p a r a g r a p h
3 - 1 7 1 .
(s) Remove six screws ( 8 4 , f i g . 3 - 2 2 )
and nuts (85) which secure the battery access door
(86) to the lower front housing (93) and remove
battery access door (86).
~) Perform steps ~ through ~ of
p a r a g r a p h
3 - 8 7 .
(1)
Removal.
(g) Remove 10 screws (55) and nuts (56)
(~) Position suitable container to collect
which secure the housing top front (57) in the front
radiator coolant.
and rear.
C h a n g e 9
3 - 8 2