T M 5 - 6 1 1 5 - 5 8 5 - 12
N A V F A C P - 8 - 2 6 2 - 12
T O - 3 5 C 2 - 3 - 4 5 5 - 1
T M - 0 5 6 8 4 C - 12
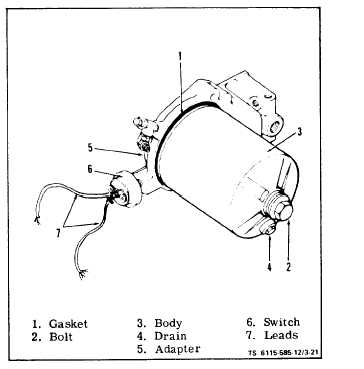
F i g u r e 3 - 2 1 . O i l F i l t e r a n d O i l P r e s s u r e S w i t ch
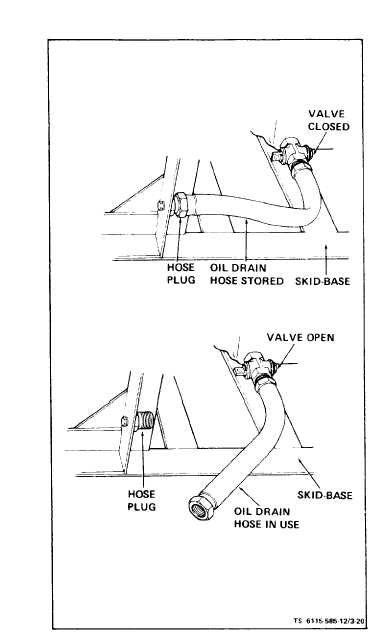
Figure 3 - 20 . Oil Drain Hose
e . O i l F i l t e r A s s e m b l y ( s e e f i g u r e 1 - 1 ) . I n s p e c t o il
f i l t e r a s s e m b l y f o r d e n t s o r o t h e r p h y s i c a l d a m a g e.
C h e c k f o r l e a k s e s p e c i a l l y a t g a s k e t ( 1 , f i g u r e 3 - 2 1)
between body (3) and adapter (5) and between bolt (2)
and body (3). Check to see that drain plug (4) is se-
curely in place and does not leak.
f. Oil Pressure Switch (see figure 3-21). Inspect oil
p r e s s u r e s w i t c h ( 6 ) f o r d e n t s o r o t h e r p h y s i c a l d a m-
a g e . C h e c k t h a t s w i t c h i s s e c u r e l y m o u n t e d t o o i l
f i l t e r a d a p t e r ( 5 ) . C h e c k f o r l e a k s w h e r e s w i t c h ( 6)
a t t a c h e s t o a d a p t e r ( 5 ) . C h e c k t h a t b o t h e l e c t r i c al
connections (7) to switch (6) are tight and free of cor-
r o s i o n .
g . O i l P r e s s u r e G a u g e A s s e m b l y ( s e e 4 5 , f i g u re
3-17). Inspect glass lens to see that it is not cracked.
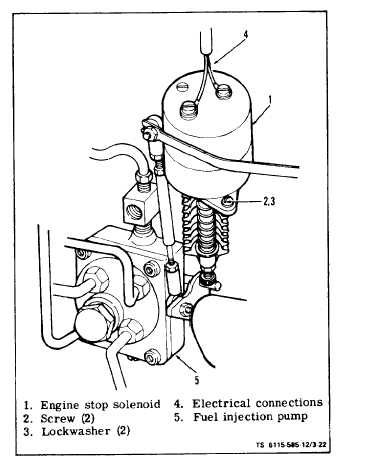
Figure 3-22. Engine Stop Solenoid
3 - 2 5