TM 5-6115-545-12
TO 35C2-3-444-1
NAVFAC P-8-626-12
TM 00038G-12
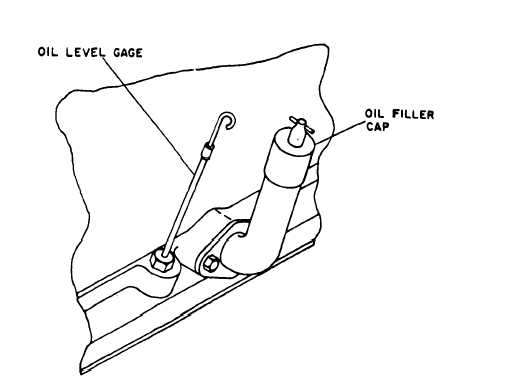
Figure 3-2.
remove breather tubes (2, 6 & 8, fig. 3-12.1) from the valve
cover, crankcase, oil separator and air intake system. Clean
inside of tubes with cleaning solvent, blow out with compressed
air, and replace on engine and oil separator.
b. Cleaning. Keep all external parts not requiring
lubrication clean of lubricants. Before lubricating equipment,
wipe all lubrication points free of dirt and grease. Clean all
lubrication points after lubrication to prevent accumulation of
foreign matter.
c. Oil Level.
CAUTION
To prevent overfill of the oil sump, remove oil filler
cap when checking oil with set running.
(1) Crankcase oil level must be checked frequently.
(2) Oil may require changing more frequently than
usual because of contamination by dilution and because sludge
formation will increase under cold weather operation conditions.
(3) Before draining the oil system, operate the engine
until a minimum coolant temperature of 160° F is obtained.
Shut engine off, open the engine oil drain valve and remove the
oil drain plug from the skid and allow the oil to drain into
appropriate container. Refer to para 3-4 d. for oil filter service.
Oil Level Gage and Filler
(4) Install the drain plug, close the oil drain valve and
fill the crankcase with 26 quarts of the specified grade of
lubricant to the FULL mark on the oil level gage. Use the side
of the oil level gage stamped STOPPED.
(5) Place dead crank switch (49, fig. 3-27) in the off
(down) position and crank engine for 15 seconds, then place
dead crank switch in on (up) position.
(6) Start and operate the engine for approximately 5
minutes.
(7) Stop the engine and allow several minutes for the oil
to drain back to the crankcase before checking the oil level.
(8) Using the oil level gage, (fig. 3-2) check the oil
level and add oil as necessary to raise the level even with the
FULL mark on the oil level gage.
(9) Observe the engine for oil leakage. Repair oil leaks
before continuing operation.
d. Oil Filter Service
See figure 3-3 and service the oil
filters as follows:
CAUTION
Disconnect negative lead from battery prior to
servicing oil falter.
(1) Drain oil filter by removing plug (l). Drain oil into
appropriate container.
3-4 Change 18


