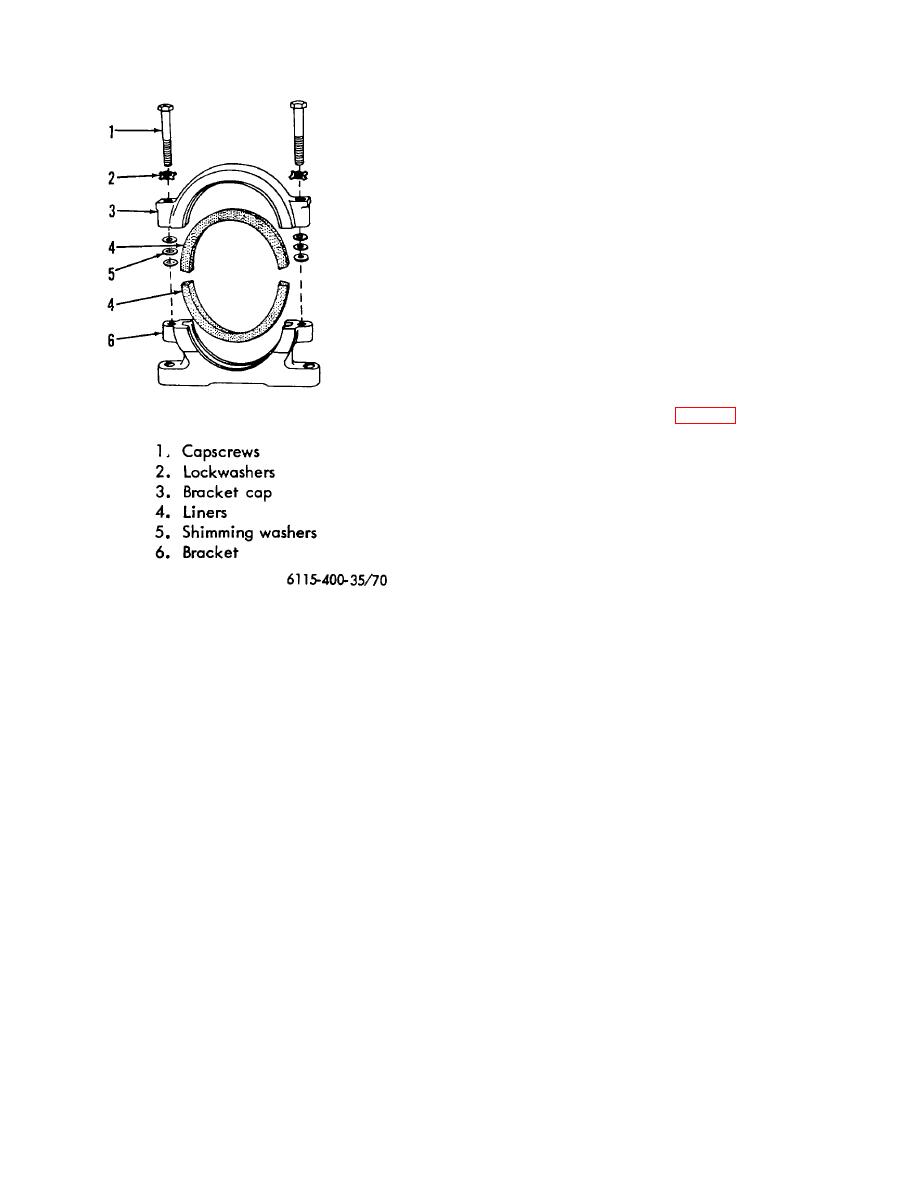
TM 5-6115-400-35
95-105 ft. lbs. Determine the
amount of shimming washers
necessary to fill the gap between
ends of the bracket and cap.
(e) Remove capscrews and install
shimming washers to equal the gap.
Note. Shimming washers are 1/32
inch thick and must be evenly
distributed on both sides of bracket.
(f) Reinstall capscrew and torque to
95-105 ft. lbs.
Note. The bracket assembly must
be a tight fit on trunnion to avoid
"bearing out" the liners.
c. Timing Gear Housing Cover.
(1) Removal.
(a) Remove crankshaft pulley/vibration
damper (para 47).
(b) Remove engine front mounting
bracket.
(c) Remove fan, fan hub, and fan hub
mounting bracket.
(d) Remove water pump pulley, water
pump belt idler, and idler support
bracket, and filler pipe support.
(e) Remove capscrews securing the oil
pan to timing gear housing cover.
To facilitate removal and installation
of timing gear housing cover, it is
Figure 70. Engine front mounting bracket-with
possible to loosen the oil pan
liners.
capscrews enough to lower front
end of the oil pan; however, it is
(b) Remove the old liners and carefully
recommended that the oil pan be
clean the grooves in the bracket
removed and all gaskets replaced.
and cap.
(f) Remove capscrews securing timing
(3) Installation.
gear housing cover to timing gear
(a) Install new liners, making certain
housing and jar cover loose with a
that the liner ends are flush with the
soft-headed hammer; pry cover
ends of the grooves in bracket and
from locating dowels and remove it
cap.
from engine being careful not to
damage front portion of oil pan
(b) Install bracket on frame. Install
gasket.
bracket securing hardware-do not
tighten at this time.
(2) Installation.
(c) Lower engine into position on
(a) Before installing cover, install a new
bracket and install bracket cap and
crankshaft front oil seal (refer to
securing capscrews.
para d. following).
(d) Tighten bracket cap securing
(b) Remove burrs from keyway in
capscrews evenly to a torque of
crankshaft, using a fine-cut mill
104


